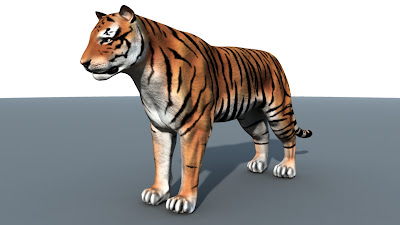
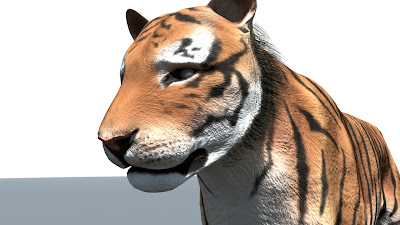
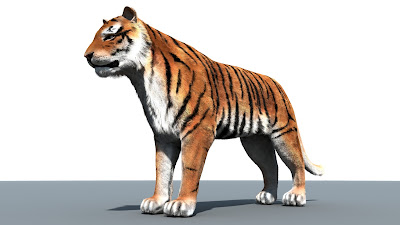
I've spent quite a lot of the time this term fixing problems and improving aspects of the rig.
The first glitch I went to fix was a problem with the right jowl. When the control for this was moved upwards for a snarl it would cause the whole joint to flip 90 degrees for some reason. The flipping problem was only apparent on the right hand side although the deformation on both jowls wasn't quite right; they would become slightly flat when the head was tilted upwards.
Here's a video of the problem:
The flipping problem was caused by the right jowl joint having a strange default rotation value of 180, 180, 180. This made it look complete normal while it was in fact flipped (I have no idea how that happened or how I missed it). This strange rotation cause the aim constraint to flip over when the joint hit a certain angle.
The way I fixed it was that I changed the values back to 0, 0, 0 and then made them controlled through IK handles instead of aim constraints. This fixed both the flipping problem and the slightly off deformation when the head was angled.
Here's how the improvement looks:
The next thing I did was improve the IK controls in the legs. Previously the leg was positioned using a controller around the foot and then the wrist rotation was controlled separately with an FK control. This setup was quite unintuitive as I found out while animating the walk and run cycles last semester: I had to position the foot and then separately adjust the wrist/ankle angle which then caused the foot to change height and position on the floor and then required a readjustment of the IK control to correct the position.
Here's a demonstration:
Ideally I wanted both IK control and rotational control of the feet in a single control so I could position the foot and have it pivot around the base when I added rotation. The way I got this to work was I added another IK handle to the joint nearest the floor (the equivalent of the ball of the foot on a human) and made it sticky. I then grouped this new IK handle with the original one at the heel/wrist and made the group a child of the control curve.
Here's the result:
This control setup is much more preferable to the previous one.
The next problem was to do with scaling the rig. There were some glitches left behind from last semester to do with scaling in relation to the muscles. I thought I had dealt with this by connecting the 'tiger scale' attribute into the 'user scale' of the muscles but this appears only to influence the size of the NURBS objects which make up the muscles and not their weighted influence on the mesh.
The result of this is pretty weird...
This was a fairly simple fix but it took a bit of searching to find the right attribute to connect to. Here's the scaling working properly:
After that I noticed that the deformation around the shoulder and scapular areas was really quite off. Here's what I mean:
This was a case of editing the weights in these areas (NOT fun).
After a lot of tedious work I ended up with some much better deformation and some easier-to-select Pole Vector curves:
I might see if I can make the deformation even better but so far I'm fairly happy with the way it's working.
That's all for now. More updates soon.
A Strange Adoption
Sunday, 26 February 2012
Saturday, 25 February 2012
Carrying On - Colour and Fur
Over Christmas break I basically carried on improving the tiger rig and working on the textures as well as finding some way of getting a furry appearance. The first thing I did was to attempt to get a the look of fur without immediately resorting to Maya fur systems. In the previous blog I uploaded some Mudbox viewport renders of the tiger with a sort of rough furry look sculpted into the mesh. Here's a reminder of how that looked:
It worked quite nicely to an extent but since it was just a quick test I didn't try to get the flow of the fur quite right. That was last semester, this semester I've redone the fur texture with more attention paid to the way it should be flowing. Here's a viewport render of how that looked:
Now the fur flows properly. After this I started work on the diffuse (colour) texture channel. This took quite a while to get right since the stripes on a tiger actually have a surprisingly distinctive look and shape to them making it really easy to spot if something isn't quite right. I painted the texture directly onto the model in Mudbox in several layers: White and Orange, Stripes and a couple of layers of extra detail for the mouth and around the eyes.
In the end it looked like this when combined with a normal map created from the sculpted fur:
The result is alright but the fur effect created by the normal map isn't very convincing around the mane area considering I'm aiming for photorealism. At this point I decided to try out Maya's hair (not fur) system. What I did was to first create a polygon structure around where the mane should be. This was to serve as a sort of scaffold for some NURBS curves to be built around.
With the curves built I then assigned a paintfx hair system to them. At this point the hair system doesn't display, it just dictates that any hairs created will follow the shape of the curves. The hairs became visible when I went to Hair > Create Hair and then made sure they were created in the hairsystemShape1 node that was created on the curves earlier. This also added hair follicles to the whole tiger in random ways which I didn't want. It was simply a case of deleting those follicles and that fixed it.
I went into the options for the hair system and played around with the settings until I had the right density, colour, thickness, etc. Then I rendered it:
The result was interesting, but it wasn't what I wanted. The hair sort of clashed with the normal map and create a sort of immediate hair line where the mane started which wasn't very realistic. It became clear that this wasn't going to work, but it wasn't really wasted time. I learned a great technique for creating and controlling hair which could come in useful for human hair and maybe even foliage in future.
I realised I needed really to have total coverage over the whole tiger's body. To achieve the effect I really wanted I really had to use Maya Fur.
Starting out, I had no idea how to use fur so this was something I had to learn from scratch. Oddly enough there are very few tutorials on how to use fur so that didn't help either. I started out with a Bear fur preset and applied it to the body of the tiger. In the options box I connected the tiger's diffuse texture to the fur base and tip inputs so that the fur rendered with the correct colour. I then found out you could change the fur's attributes through a paint tool. This was really important for getting the varying fur lengths, directions and inclinations.
Having played around for a while I had a system with 200000 hairs and, from what I could discern from the hair curve preview, something vaguely tiger-like. I hit render to see how it would look and, importantly, how long it would take. Here's the render I got in the end:
This was much closer to what I wanted. The problem with it was it took just over 50 minutes to render. At that rate I probably could have hit render then and there and not have had every frame by the deadline 3 months later. Instead of giving up I decided to see if I could reduce the render time down to something vaguely reasonable.
I reduced the volume samples to 2 from 5 and changed the renderer from scanline to rasteriser as well as removing all the dynamics from the fur. In the end I got the render time down to just under 2 minutes: A massive improvement. This allowed me to even make the fur a little more dense as a bonus.
Here's how things looked after the render tweaks:
This took about 3 minutes to render and had a density five times that of the previous render. And that's basically the stage at which the fur is at right now. I've recently been making some changes and fixes to the rig and I'll update on how that's going soon.
That's all right now.
Subscribe to:
Posts (Atom)


